

The other day I got a question that I had to think about first and asked myself why I didn't think of it.
A chandelier is supposed to go to the ceiling, where do I hide the lighting electronics?
In between? Doesn't fit, otherwise I have to adjust the interior.
Box on the Roombox? Doesn't look so nice.
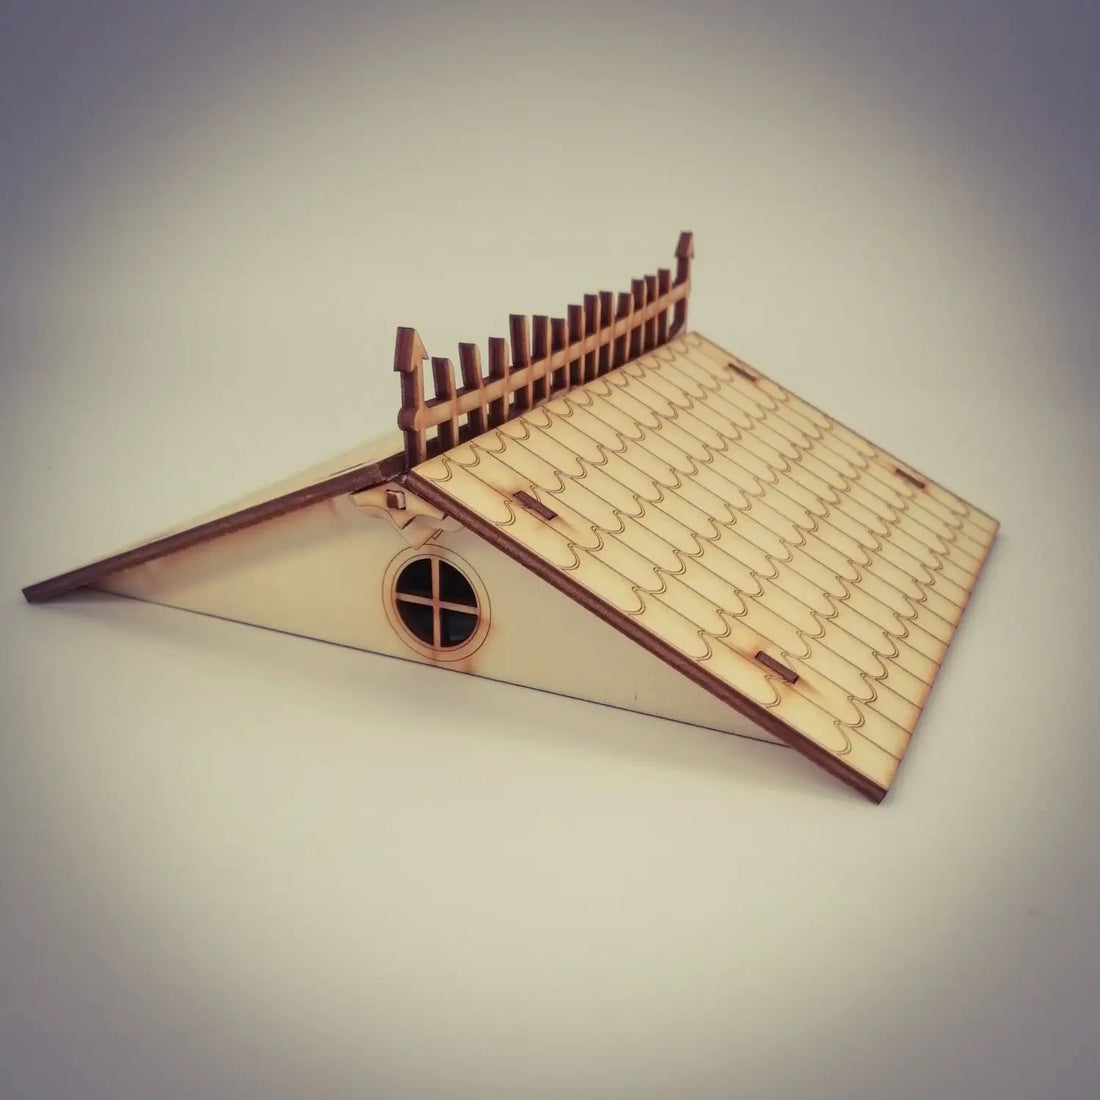
Roof? Sure, of course! Why not actually a roof?! The room box looks like a house anyway. Of course, the house needs a roof and underneath you can also hide a lot of cables and battery owners and even enter a switch on the back.
And so you build the new part together:

You put the blends on the gable. If this does not fit right away, the pen aisle to put on a bit.

Then you put the gable on the roof font and back. Then glue both roof pages. The parts with the engraved shingles have plug -in holes for the side parts. The holes are arranged so that there is more space to the front than back. So the roof is a little more over at the front. The gable slender concludes with the roof.
The best way to stick is with wood glue, I take the Express glue from Ponal, it dries quickly and especially transparent.
You can paint the wood with acrylic paints or other wooden colors.
If you want to enter a switch, I recommend it to you before assembling.
And now have fun tinkering. If you have any questions or suggestions, please send them in the comments here. Or write to me.