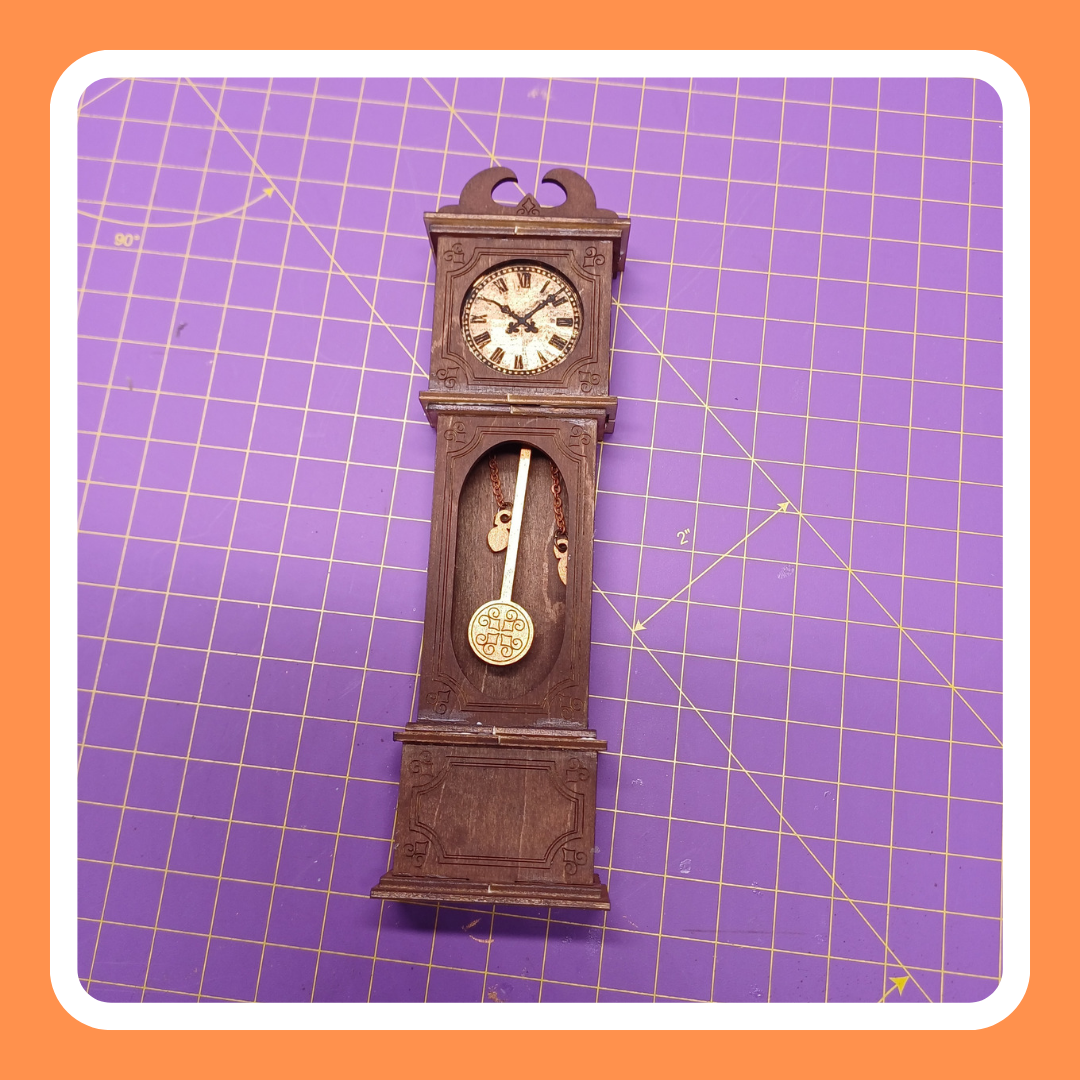
You have the parts in front of you and want to get to work? Then you need the following things:
- Craft glue (my favorite: Ponal Express)
- some masking tape (if you don't have enough patience to hold on)
- a cloth or blade to wipe away excess glue
- Acrylic or other wood colors + brushes
- Two pliers (to mount the chain)
And then we can already start:
First, remove the parts that are to be painted with a different color than the rest. With me were the dial and the pendulum.

Then you can paint the remaining parts without paying attention. I applied a thin layer of brown paint with a wet brush.

And after drying, a layer of highly diluted black paint (washing)

After drying, you can remove the remaining parts from the sheet. Be sure to use a blade so that the thin wood does not break or tear out.

I start with the middle part of the clock

And first pasted the pendulum with the two round parts, so the pendulum looks later as if it could actually swing.


I painted the pendulum and the chain parts with a copper.
Plug or Then stick on the part with the holes. So around the holes, as can be seen in the photo, sit in front of the pendulum.

With the side parts, make sure that the narrow side points to the front!

Finally, just stick on the base plate...

And let it dry with patience!

For the chain you need two pliers to bend the split rings

You thread the chain through the two holes in the lid,

Hang the small parts (if you point as they are, please in the comments below!) And bend the rings back together.

Then you can continue with the bottom box.

Here, too, make sure that the side parts are attached in such a way that the narrow insertion side points to the front.

Finally, you stick on the base plate. It stands in front and on the sides, like a small step.

Next, paint the watch with a desired color. I chose a copper, as for the pendulum.

To highlight the numbers again, I crossed out with heavily diluted black (washing).

After drying, the number was flat too dark for me. To fix that, I picked up very little paint with a dry brush and dabbed it.
Now you can assemble the last box, just like the first two.

The hole in the floor is that the chain can still be moved, it should (like the holes in the other box) be close to the front.

Before you stick on the lid and the back wall, stick in the face.

Now you can already glue the three boxes together.

Put them on top of each other so that the back runs in line so that it can later be glued to a wall.

Finally, you just stick the lid on and the "horns" on.

And the grandfather clock is as good as finished.
At the end I painted even more details by wiping highligts with a dry brush with very little paint (light brown tone) and dabbed the sharp edges with a yellow tone.
Have fun crafting! Should you have any questions write to me the same HERE!
Share your result with me or in our Exchange Forum !


2 Comments
Hab’ in meinem eben geschriebenen Kommentar noch etwas vergessen. “In echt” ist der hohe Kasten mit Pendel, Kette und Gewichten natürlich hinter Glas staubgeschützt verbaut.
Hier könnte man bei deiner Miniatur-Standuhr, liebe Katrin, ggf. ein hauchdünnes Acrylplättchen (aus Verpackungsabfall z.B. von Pocket Coffee, o. ä. ) einkleben (aus solchen Teilen mache ich ab und zu Fensterscheiben im Krippenbau). Versucht es doch mal, stellt es zur Probe rein und erst dann einkleben, wenn es euch auch gefällt, gut wirkt sowie beste Durchsicht auf das tolle Innenleben der Uhr ermöglicht! Viel Vergnügen in Katrins wunderbarer Miniaturenwelt KatNook und für jetzt glg!
Welch zauberhaftes Teil ist denn diese Stand-Pendeluhr geworden, liebe Katrin?!? Habe ja schon bestellt – das werden wunderbare Prunkobjekte in meinen zukünftigen Miniaturen werden. Bzgl. deiner Frage, wie die Dinge heißen, die an den beiden Enden der Kette oder auch am Seil hängen: das sind die Uhrgewichte oder auch Uhrengewichte und dienen dem Aufziehen des Uhrwerks durch ganz vorsichtiges Ziehen an einer Seite. Man kennt sie in unseren Breiten meistens in Form von Tannenzapfen. Eines der Gewichte wandert im Laufe der fortschreitenden Zeit immer mehr nach unten und dann muss eben neu aufgezogen werden (hoffentlich hab’ ich da jetzt keinen Blödsinn erzählt – bin ja kein Uhrmacher ;-) – aber ich glaube, mich aus meiner Kindheit zu erinnern, dass das so abgelaufen ist. Jedenfalls durften wir Kinder niemals die Uhren, die es in vielen Haushalten gab, aufziehen – so sensibel war der Uhrenaufzug.
Zurück zu deinem Objekt – auch diese Standuhr liebe ich jetzt schon und freue mich riesig, wenn ich sie dann zusammenbauen, bemalen und gestalten und bestmöglich platzieren kann! Danke dafür, liebe Katrin – das ist wieder ein bezauberndes, wunderschönes Produkt geworden!